Introduction:
A Beginner’s Guide to Beautiful Handmade Creations
If you love creative projects, then you’ll be excited to know that DIY Pressed Flower Art & Resin Jewelry is becoming one of the most loved craft trends in 2025. In this blog, we’ll explore how anyone even beginners can turn simple flowers into long-lasting art and accessories. From basic supplies to easy steps, you’ll learn everything you need to start today without any stress.
Why Pressed Flower Art Is Trending
Pressed Flower Art & Resin Jewelry art brings nature into your space in a soft, aesthetic way. Instead of throwing away petals, people are preserving them to create:
- wall frames
- phone case designs
- bookmarks
- greeting cards
This trend fits perfectly with eco-friendly décor because it uses natural materials instead of synthetic decorations.
Benefits of Pressed Flower Art
- Affordable and beginner-friendly
- No professional tools required
- Adds a personal, handmade touch
- Great for gifting and home decor
- Eco-safe and sustainable
Plus, the results look premium without expensive effort.
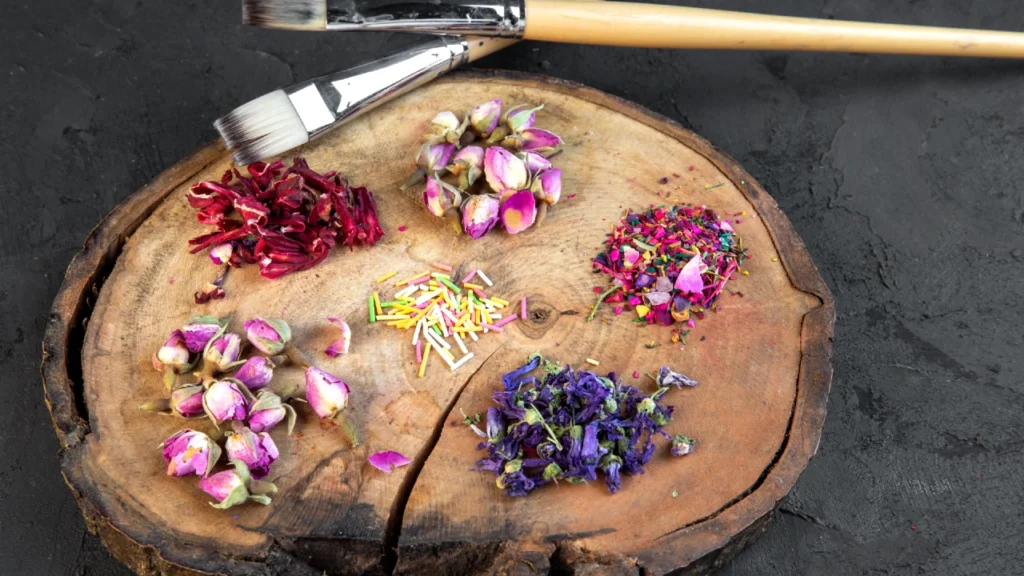
How to Press Flowers the Easy Way (Beginner Method)
You don’t need special machines just simple items at home.
Materials You Need
- Fresh flowers or leaves
- Tissue or blotting paper
- Heavy books
- Scissors
Steps to Press Flowers
- Pick fresh flowers and trim the stems.
- Place them between clean tissue sheets.
- Put inside a heavy book and close firmly.
- Add more weight on top.
- Leave for 7–10 days until fully dry.
Pro Tip: Flat flowers like daisies, pansies, and baby’s breath press beautifully.
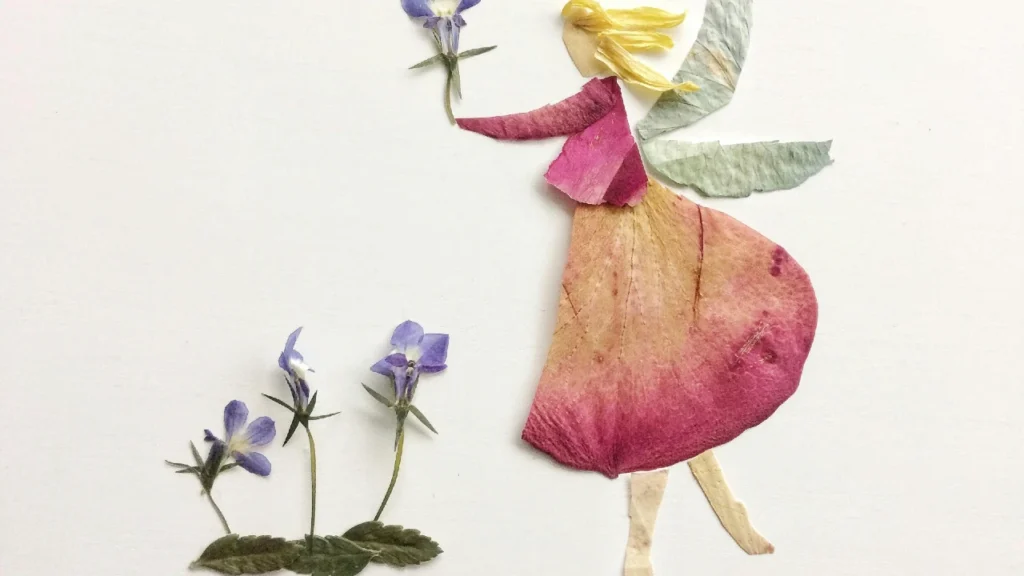
Resin Jewelry: Turning Pressed Flowers Into Wearable Art
Resin jewelry allows you to turn delicate petals into long-lasting accessories like:
- pendants
- earrings
- rings
- keychains
The clear resin gives flowers a glass-like finish that looks elegant and modern.
Basic Supplies for Resin Jewelry
- Epoxy resin & hardener
- Silicone molds
- Pressed flowers
- Mixing cups & sticks
- Gloves
- UV lamp (optional for UV resin)
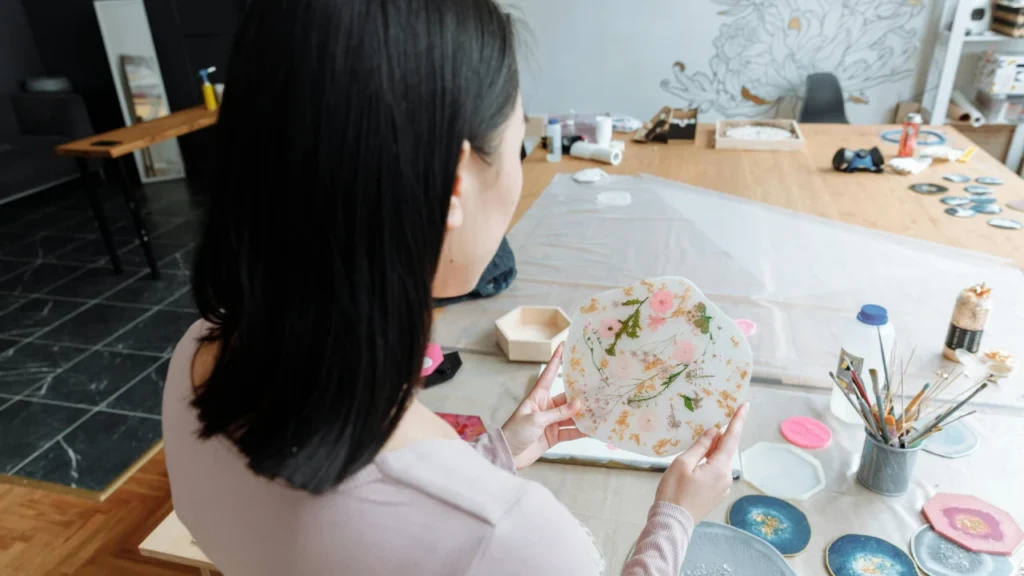
Simple Step-by-Step Resin Jewelry Guide
- Mix resin and hardener according to instructions.
- Pour a thin layer into the mold.
- Place pressed flowers carefully using tweezers.
- Add the remaining resin slowly to avoid bubbles.
- Let it cure for 24–48 hours.
- Remove from the mold and attach jewelry findings.
Safety Reminder: Always work in a ventilated space and wear gloves.
Top Beginner-Friendly Ideas (Try These First!)

Here’s a helpful list you can use to get started simple, aesthetic, and quick:
- Mini resin pendant using tiny petals
- Clear phone grip with dried flowers
- Bookmark with pressed leaves
- Resin coasters with golden flakes
- Floral frame for wall decor
Choose one small project before moving to bigger designs—this builds confidence fast.
Where to Add Creativity and Personal Style
You can customize your art using:
- glitter or gold foil
- colored resin tint
- initials or names
- matching flower sets
These little additions turn simple DIY pieces into unique keepsakes.
Smart Tips To Make Your Projects Look Professional
- Keep flowers completely dry before using
- Avoid thick flowers they trap moisture
- Remove bubbles with a toothpick
- Don’t rush curing time
- Store resin away from sunlight and heat
These small steps make a big difference in the final finish.
Promotion Mention
For more easy and fun ideas, 5minutescrafts offers great inspiration for beginners perfect if you want quick tutorials and budget-friendly creative hacks.
Final Thoughts
DIY Pressed Flower Art & Resin Jewelry proves that beautiful things don’t need expensive tools or complicated skills. Whether you want to decorate your home, make meaningful gifts, or simply relax with a new hobby, this trend gives you a calming and rewarding experience. Start small, enjoy the process, and let nature inspire your creativity one petal at a time.